
Introduction to In Place, Vertical, or Large Project Etching
(Click on photo for larger view)
|
Introduction to In Place, Vertical, or Large Project Etching(Click on photo for larger view) |
|
![]() In Place,
Vertical, and Large Project Etching Instructions: Step One --
Supplies
In Place,
Vertical, and Large Project Etching Instructions: Step One --
Supplies ![]()
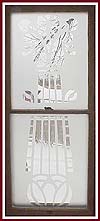
Many Egress Etch customers ask us if it is possible to etch glass "in place." This means they want to etch while the glass remains in a vertical position. Although it is a bit more complicated and you need to work against the forces of gravity, etching in the vertical IS possible. Here at Egress Etch, we have developed a technique that really works! (For a better look at the example pictured above, click on the photo or here, and please visit our Inplace, Vertical, or Large Project Etching Photo Album for more wonderful ideas.) When etching a glass piece in place, in the vertical position, or larger than 100 square inches, consider the following as you plan your work: |
| |
Due to the necessity of a very tight seal between stencil and glass surface, Egress Etch stencils are made from adhesive backed vinyl and are SINGLE USE only. If you are etching a number of pieces in the same pattern, you must order a stencil for each piece. |
| |
When your stencil order arrives, open the box carefully. Large stencils will be rolled for shipping. Open the package and lay the stencils flat until you are ready to use them. |
| |
Make sure to measure and check your stencils for alignment. This is especially important if you are installing etched borders or corners! |
| |
Never etch vertically if it is possible to lay the piece flat. Why fight gravity if you don't have to? If you wish to etch the glass in your front door, for example, it is much easier to pull the hinge pins and lay the door flat than it is to etch it vertically in place. Many windows frames can be removed from the casing. If it is possible to remove the glass, do so, even if it takes extra time. If you are working on a new construction or renovation, ask your contractor if you can have access to mirrors, shower enclosures, doors, windows, and cabinets before they are installed. |
| |
Never do an "in place" etching as your first project! You need to practice and become familiar with the process of glass etching by doing small pieces and working on a flat horizontal surface. Practice, practice, practice before tackling large pieces and/or in-place vertical etching. |
| |
Etching cream is a fluid and it will "sag" somewhat during the etching process. Prepare for this in advance. Make sure to protect surrounding surfaces ESPECIALLY ceramic tile, sinks, tubs or any glass or ceramic surfaces. Etching cream WILL etch anything that is ceramic or glass. Even one drop in the wrong place will leave a visible mark. Etching cream may discolor some paints, stains, fabrics, and other finishes or surfaces. The time you spend in preparation and protection of all surfaces in the project area will help you to get a perfect job. Use plastic drop clothes or plastic garbage bags secured with masking tape to protect surfaces. Mistakes caused by drips, spills or sloppy application cannot be corrected because ETCHING IS PERMANENT! |
| |
Ask questions BEFORE you begin. The staff at Egress Etch will be happy to help you. We give free technical support…but don't wait until you are up to your elbows in etching cream to call us! |
Practice first, follow the drawings and steps shown on our In Place, Vertical and Large Project Etching Instructions, stay calm, have fun and you will have a beautiful work of art that will last a lifetime!
|
![]() In Place,
Vertical, and Large Project Etching Instructions: Step One --
Supplies
In Place,
Vertical, and Large Project Etching Instructions: Step One --
Supplies ![]()
![]() In Place, Vertical, and Large Project
Etching
In Place, Vertical, and Large Project
Etching ![]() Custom Designs
Custom Designs ![]()
![]() Custom Stencils for Glassware
Custom Stencils for Glassware ![]() Glass Etching
Supplies
Glass Etching
Supplies ![]()
![]() What is "Weeding?"
What is "Weeding?" ![]() What types of
glassware can I etch?
What types of
glassware can I etch? ![]() How To Etch Glass: General
Instructions
How To Etch Glass: General
Instructions ![]()