
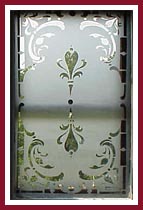
Instructions For In Place, Vertical, or Large Project Etching:
Preparing the Glass
(Click on photo for larger view)
|
Instructions For In Place, Vertical, or Large Project Etching:Preparing the Glass(Click on photo for larger view) |
|
TIP: NEVER allow etching cream to touch any glass surface you do not want etched, including porcelain sinks, tile, etc. Etching cream may lighten some types of paint. ALWAYS mask off adjoining glass and painted surfaces before etching to protect from splatter or accidents with the etching cream. Due to the necessity of a very tight seal between stencil and glass surface, Egress Etch stencils are made from adhesive backed vinyl and are SINGLE USE only. |
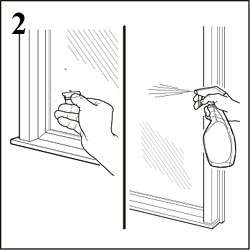 |
Step 2:Use a single edge razor blade to remove any paint that may be on the glass (especially check around edges where "over paint" is common). Use window cleaner and paper towels or a lint free cloth to thoroughly and completely clean the glass. |
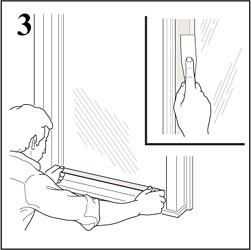
Step 3:Run masking tape around the entire window frame making sure to cover the frame right up to the glass. Press the tape firmly into place with a plastic putty knife or burnishing tool (squeegee). |
 |
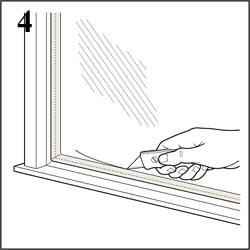 |
Step 4:Run a razor knife or single edged razor blade along the edge where the glass meets the frame. Remove any masking tape that is on the glass. Protect the floor and other areas in the work area with drop clothes and/or plastic sheeting. |
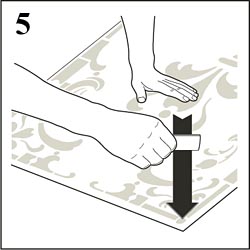
Step 5:Lay your stencil on a flat surface and "re-burnish" it on the transfer tape side. Using your burnishing tool or a plastic putty knife, carefully rub the transfer tape with firm pressure working from the center of the stencil outward to the edges. This helps to ensure that all the pieces of the stencil are adhered to the transfer tape for placement onto the glass. |
 |
Glass and stencil prepared and ready to go? Now, you must decide on a "Wet Mount" or "Dry Mount" application method for placing the stencil on the glass. If you choose the wet method, you will need Window Juice, available from Egress Etch in 4 oz and 32 oz sizes. |
![]() In Place, Vertical, and Large Project
Etching
In Place, Vertical, and Large Project
Etching ![]() Custom Designs
Custom Designs ![]()
![]() Custom Stencils for Glassware
Custom Stencils for Glassware ![]() Glass Etching
Supplies
Glass Etching
Supplies ![]()
![]() What is "Weeding?"
What is "Weeding?" ![]() What types of
glassware can I etch?
What types of
glassware can I etch? ![]() How To Etch Glass: General
Instructions
How To Etch Glass: General
Instructions ![]()