
Instructions For In Place, Vertical, or Large Project Etching:
Wet Mount Stencil Application
(Click on photo for larger view)
|
Instructions For In Place, Vertical, or Large Project Etching:Wet Mount Stencil Application(Click on photo for larger view) |
|
TIP: The adhesive for the stencils is specifically designed to hold tight to the glass during the etching process. Be very careful to align and place the stencil properly the first time. You cannot remove the stencil and reposition it once it is stuck to the glass! Please remember: Due to the necessity of a very tight seal between stencil and glass surface, Egress Etch stencils are are SINGLE USE only. |
|
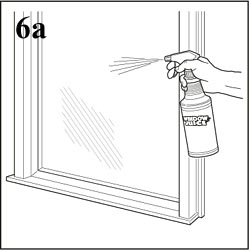
Step 6a:Read the instructions on the Spray Window Juice application spray bottle and apply the spray as directed. |
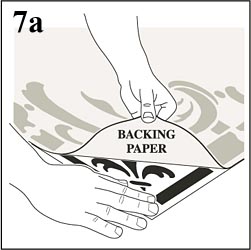
Step 7a:Carefully remove the stencil backing paper, pulling the paper "back against itself" at a 180°. This exposes the stencil adhesive. Watch the paper as you remove it. If any portion of the stencil remains on the backing paper, simply push the paper back down and burnish that section again. |
 |
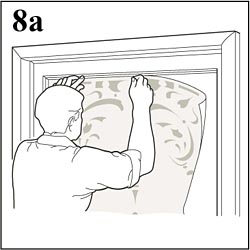 |
Step 8a:Gently and carefully position the stencil on the glass. Use both hands to move the stencil to adjust position. Make sure the stencil is square and level. Align the stencil to true level rather than the window frame if the frame or window is not perfectly square. Stand back to look. Make sure the positioning of the stencil is as you want it and "looks right." When the stencil is exactly where you want it, use masking tape along the edges to secure it. |
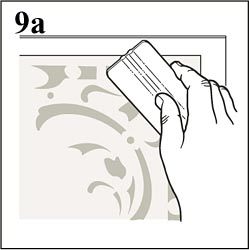
Step 9a:Squeegee out any excess liquid using your burnishing tool or plastic putty knife. Work carefully so you do not damage the transfer tape. Allow the stencil to dry thoroughly. This may take 8 - 48 hours. You can use a hair dryer set on the lowest setting to help speed the drying process but DO NOT let the stencil get heated up as this may affect the adhesive and ruin your stencil. Burnish the stencil to the glass once again, then carefully remove the pieces of tape you used to tack the stencil in place. |
 |
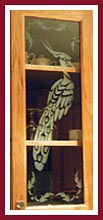
When the stencil is completely dry, you are ready to continue on to the next step in creating your masterpiece! |
![]() In Place, Vertical, and Large Project
Etching
In Place, Vertical, and Large Project
Etching ![]() Custom Designs
Custom Designs ![]()
![]() Custom Stencils for Glassware
Custom Stencils for Glassware ![]() Glass Etching
Supplies
Glass Etching
Supplies ![]()
![]() What is "Weeding?"
What is "Weeding?" ![]() What types of
glassware can I etch?
What types of
glassware can I etch? ![]() How To Etch Glass: General
Instructions
How To Etch Glass: General
Instructions ![]()