
Instructions For In Place, Vertical, or Large Project Etching:
Final Preparation of the Stencil
(Click on photo for larger view)
|
Instructions For In Place, Vertical, or Large Project Etching:Final Preparation of the Stencil(Click on photo for larger view) |
|
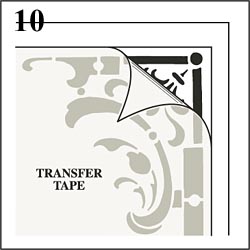 |
Step 10:Carefully remove the trasfer tape, starting at one corner and slowly pulling the tape "back against itself." If a piece of the stencil lifts off the glass, simply push that section of the tape back down onto the glass, re-burnish the area and continue to peel off the tape. Note: if you chose the "wet mount" method and you are having trouble keeping the stencil pieces on the glass, the window and stencil are not yet dry enough! WAIT and try again when the piece has had more time to dry. |
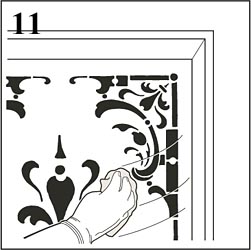
Step 11:Once all the transfer tape is removed, again wipe the stencil and glass with a paper towel wetted with window cleaner. DO NOT spray window cleaner directly onto the stencil! This removes any excess Window Juice, dirt or oil from you hands that may have gotten on the glass up to this point. The window must be absolutely clean before you etch. |
 |
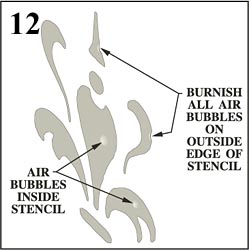 |
Step 12:Check all the elements of the stencil to make sure they are completely tight to the window. Any air bubbles along the outside edges must be burnished down. Do not worry about small air bubbles on the inside portions of the stencil pieces. As long as all the edges are tight to the glass, you will get a clean, crisp etch. |
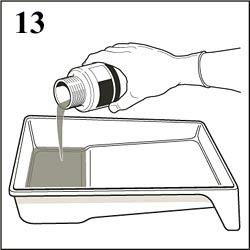
Step 13:Put on your safety glasses and protective gloves, take a deep breath and get ready to apply the etching cream. Pour the etching cream into a plastic bowl or a paint tray with a plastic disposable liner. |
 |
You are now ready to apply etching cream and complete your project! |
![]() Wet Mount
Method
Wet Mount
Method ![]() Dry
Mount Method
Dry
Mount Method ![]() Next Step
Next Step ![]()
![]() In Place, Vertical, and Large Project
Etching
In Place, Vertical, and Large Project
Etching ![]() Custom Designs
Custom Designs ![]()
![]() Custom Stencils for Glassware
Custom Stencils for Glassware ![]() Glass Etching
Supplies
Glass Etching
Supplies ![]()
![]() What is "Weeding?"
What is "Weeding?" ![]() What types of
glassware can I etch?
What types of
glassware can I etch? ![]() How To Etch Glass: General
Instructions
How To Etch Glass: General
Instructions ![]()